Add a Custom MCP Server
Through the Model Context Protocol (MCP), AI models can access external tools and data sources for more capable workflows.
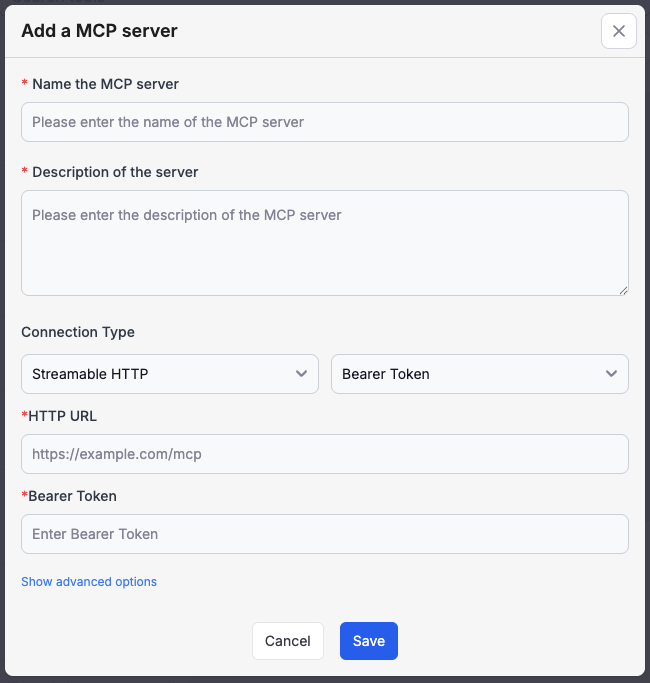
Add and use MCP servers in ConsoleX
Adding an MCP server in ConsoleX AI is straightforward:
- Open the tool panel and click Add an MCP Server in the upper-right corner.
- Paste or fill in the MCP server’s JSON description.
- Click Save to finish the integration.
Choose a connection method
ConsoleX supports three MCP connection styles:
- Streamable HTTP
- SSE
- Stdio through MCP-connect
Choose the method that best matches your MCP server.
Streamable HTTP MCP servers
For Streamable HTTP servers, ConsoleX supports OAuth 2.0 bearer token authentication as well as unauthenticated access. Select the auth mode in the configuration UI and enter the HTTP URL and related credentials.
SSE MCP servers
For SSE-based servers, ConsoleX supports bearer token header auth or no authentication. Select the mode and provide the SSE URL and auth information.
Stdio-based MCP servers
Because ConsoleX is a cloud service, it cannot directly access local resources over Stdio. To bridge that gap, you can use MCP-connect and relay a Stdio-based MCP server through it.
Typical setup steps:
- Install and run
mcp-connecton your local machine, and set anauth_tokenfor security. - Expose the MCP proxy URL to the public internet with a tunnel such as ngrok or Cloudflare Zero Trust.
- In ConsoleX Settings, configure the global MCP proxy URL and
auth_token. - After that, you can add Stdio-style MCP server definitions in ConsoleX just like you would in a local MCP client.
Example:
{
  "command": "uvx",
  "args": ["mcp-server-fetch"]
}