Add a Custom Tool
If you have your own function, webhook or API, you can describe it as a tool so the AI can call it in chats, tasks and agents. This page covers the HTTP API option. To connect an MCP server instead, see Add an MCP server.
Open the Create a Tool dialog
- Click … (More) in the left rail, then Capabilities.
- On the Tools tab, click Add custom tool.
- Choose HTTP API: "Describe an HTTP API so it can be called as a tool."
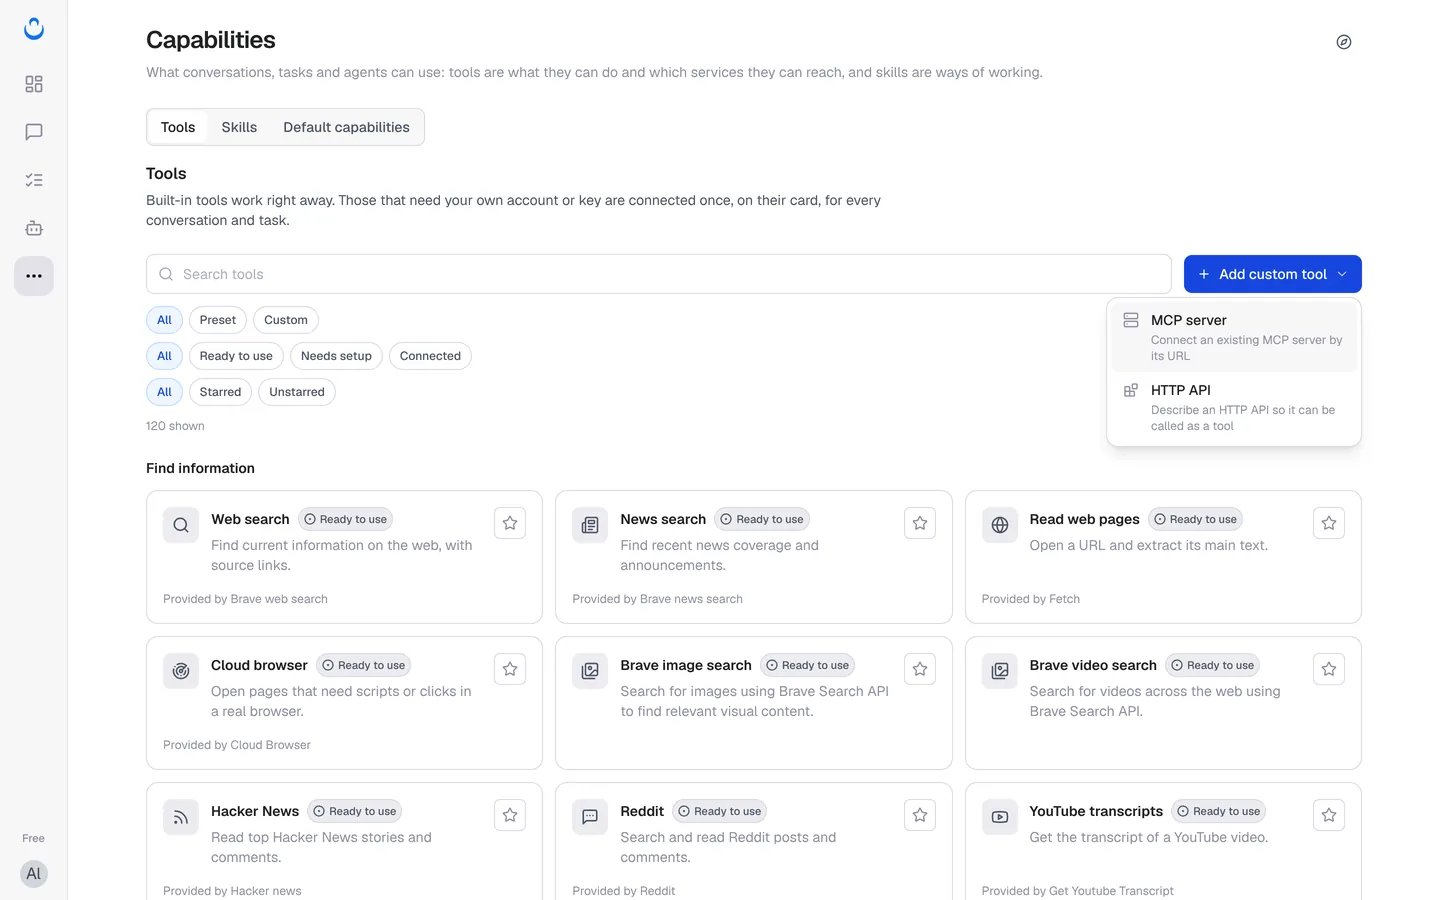
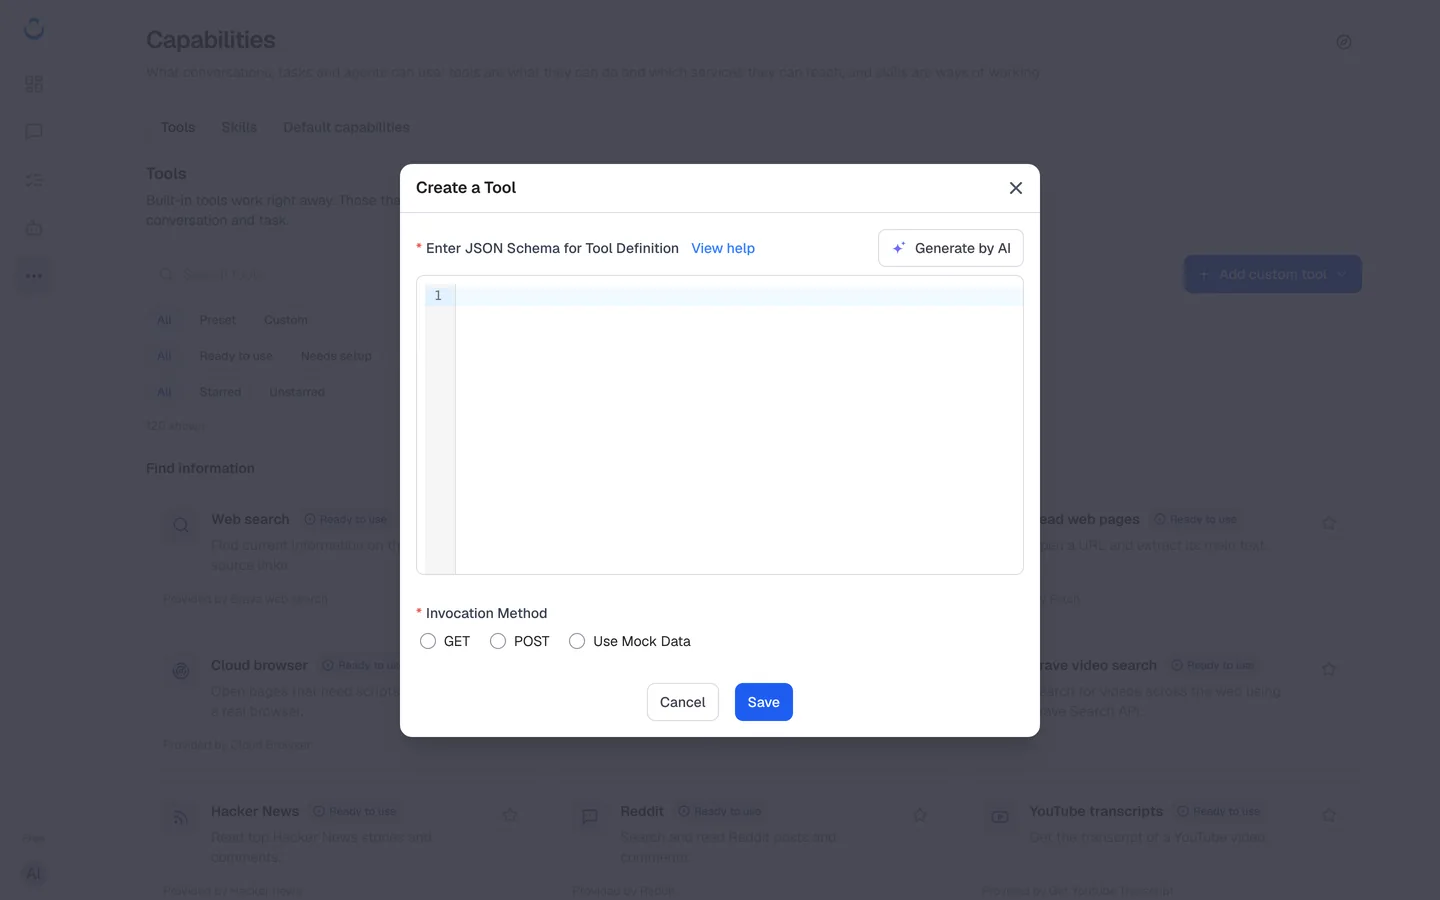
The Create a Tool dialog has two parts: the tool definition and the invocation method.
Describe the tool with a JSON Schema
In Enter JSON Schema for Tool Definition, describe what the tool does and which inputs it takes. The format is compatible with OpenAI function calling.
- Click View help to see the expected format.
- Click Generate by AI to draft the schema from a plain-language description, then check the result.
A good definition makes the tool easier for the model to use correctly:
- A clear name and a description that says what the tool does and when to use it.
- Parameters that match exactly what your endpoint expects, each with its own description.
- The parameters your endpoint can't work without listed as required.
Choose the invocation method
Under Invocation Method, choose one:
- GET or POST: ConsoleX calls your endpoint with the inputs the model provides. Choose the method your endpoint accepts and fill in the endpoint details the form asks for. Common options are a function you publish yourself, or a workflow on a platform such as n8n, Dify, Make.com or Coze (see the workflow pages in this section). If you add an API key for your endpoint, ConsoleX sends it in the
Authorizationheader as a bearer token:
Authorization: Bearer <your-api-key>
- Use Mock Data: test the tool before the real endpoint exists. This is useful when you want to see how the model uses the tool, and how good its follow-up answer is, without a live backend.
Click Save. The result your tool returns is passed back to the model, which uses it to write its answer.
Use your custom tool
Your tool appears on the Tools tab under the Custom filter. Turn it on where you need it:
- In a chat: click Tools under the message box and switch it on. The Custom filter shows only your own tools.
- In a task or agent: click Add capabilities and switch it on.
See Use preset tools for the panels, and Tool calling in chats for how the model calls tools.